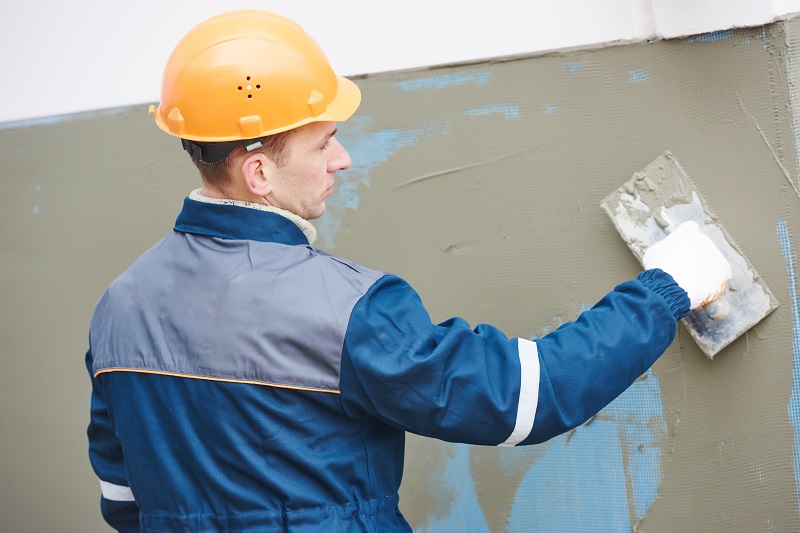
While you are concerned with renovating your home, plastering is one of the most important parts of it, as you simply won’t be able to put paint if the walls are not plastered. Thinking that the plastering of walls is easy won’t be right; it’s just not about sticking a load of plaster on a wall and smoothening it to make a flat surface. It’s also about intricate finish.
When you take all the plastering work by yourself, you first need to understand all the stages involved in it. To prepare yourself, just go by the steps and tips offered by the experts.
So, your job begins with the preparation of the walls for plastering, so firstly the question arises as what kind of wall you are working on, previously plastered or painted wall or a well-scratched wall. Also, you don’t need to worry so much about a suction test, if you’re plastering onto plasterboard then the paper on the board will do the job for you.
1. Strip the Coating
When you are going to apply a new coating on a previously coated wall, it can be a very difficult task. As at first, you’ll need to remove the previous coating bit by bit, even a single uneven coating in the wall can make the plaster look uneven. In case if you have any wallpapers stuck to the wall, remove them too. Make sure that every bit of paper or coating is removed, and the wall is clear.
2. Time to wash the Wall
Why do you need to do it, simply because there can be certain things over your wall that you have no idea about? For example, there can be grease, and the presence of grease can cause bubbles in plasters which eventually will result in the removal of plaster.

3. Check your Walls
Start with checking if there is any loose plaster. If any area happens to have cracked or peeled off the plaster, do scrap it off quickly. Plastering on unstable walls can even make the whole coating to fall off. Now again, check that if there is any coating of previous plaster which is still solid. That will make the wall uneven and the plaster unstable. If you tap the walls, you can hear when plaster is solid on the brick. It doesn’t move, doesn’t sound hollow and doesn’t fall away with pressure.
In case you have holes just use some filler before you start skimming. It’s very easy. Also, keep a check on your electrical appliances, better unscrew your light switches and do plug-in sockets. Then, it will save getting plaster all over the fittings. This just makes your life a lot easier while plastering for the first time. Once you have a solid wall with no loose material and everything cleared then only you can move on to the next part.
4. Scrim Tape
Once you are done with scraping and clearing of the walls, you must have noticed some cracks within the way, to prevent any further occurrence of a problem with these tapes. It is done to keep the plaster tight and prevents any further cracks.
5. PVA
When it comes to plastering on an existing wall, you really need to control the rate of suction. For doing this, paint or roll your walls with PVA glue.
It acts as a primer, as it is used to stop the plaster drying too quickly.
After your wall is done with PVA, you can go for plastering. Following everything above can help in getting your walls done beautifully plastered.